2. Python的安装
目录
本文讲解python3.6.2的安装。
Python下载地址
Python3.6.2安装文件的下载地址如下:https://www.python.org/downloads/release/python-362/
CentOS上的安装方法
下载安装文件:
[root@localhost ~/download]# wget https://www.python.org/ftp/python/3.6.2/Python-3.6.2.tgz
解压:
[root@localhost ~/download]# tar -zxvf Python-3.6.2.tgz
安装readline-devel解决方向键、Backspace键出现特殊符号:
[root@localhost ~/download]# yum install readline-devel
检测你的安装平台的目标特征:
[root@localhost ~/download]# cd Python-3.6.2
[root@localhost ~/download/Python-3.6.2]# ./configure
安装:
[root@localhost ~/download/Python-3.6.2]# make
编译:
[root@localhost ~/download/Python-3.6.2]# make install
查看python3的版本:
[root@localhost ~/download/Python-3.6.2]# python -V
Python 2.6.6
[root@localhost ~/download/Python-3.6.2]# python3 -V
Python 3.6.2
CentOS系统中默认自带有Python程序,且版本是较低版本的Python 2.6.6,Python是Linux系统的基础软件,很多应用基于Python程序,不要随意改动系统的默认Python版本。
启动:
[root@localhost ~/download/Python-3.6.2]# python3
Python 3.6.2 (default, Jun  8 2018, 22:28:47)
[GCC 4.4.7 20120313 (Red Hat 4.4.7-18)] on linux
Type "help", "copyright", "credits" or "license" for more information.
>>>
为了更好的使用python程序,并且不影响系统的python2环境以及刚安装的python3环境,我们安装virtualenv创建隔绝的Python环境。
python虚拟环境virtualenv的安装
安装:
[root@localhost ~]# pip3 install virtualenv
Collecting virtualenv
  Downloading https://files.pythonhosted.org/packages/b6/30/96a02b2287098b23b875bc8c2f58071c35d2efe84f747b64d523721dc2b5/virtualenv-16.0.0-py2.py3-none-any.whl (1.9MB)
    100% |████████████████████████████████| 1.9MB 5.9MB/s
Installing collected packages: virtualenv
Successfully installed virtualenv-16.0.0

[root@localhost ~]# virtualenv --version
16.0.0
python虚拟环境virtualenv的使用
创建virtual虚拟环境目录:
[blogsystem@localhost ~]$ mkdir venv
[blogsystem@localhost ~]$ ls
blogs_home  download  venv
创建virtual虚拟运行环境:
[blogsystem@localhost ~]$ virtualenv venv
Using base prefix '/usr/local'
New python executable in /cloud/blogsystem/venv/bin/python3.6
Also creating executable in /cloud/blogsystem/venv/bin/python
Installing setuptools, pip, wheel...done.
如果加上参数–no-site-packages,已经安装到系统Python环境中的所有第三方包都不会复制过来,会生成一个不带任何第三方包的“干净”的Python运行环境:
[blogsystem@localhost ~]$ virtualenv --no-site-package env
Using base prefix '/usr/local'
New python executable in /cloud/blogsystem/env1/bin/python3.6
Also creating executable in /cloud/blogsystem/env1/bin/python
Installing setuptools, pip, wheel...done.
激活virtual虚拟运行环境venv:
[blogsystem@localhost ~]$ source venv/bin/activate
(venv) [blogsystem@localhost ~]$
此时,命令行提示符发生了变化,有了 (venv) 前缀,表示当前处理名称为venv的python虚拟环境下。此时处于虚拟环境下,在该环境使用pip安装包,不会影响系统的Python环境,也不会影响他人的环境。
在虚拟环境venv下安装包:
(venv) [blogsystem@localhost ~]$ pip list
Package    Version
---------- -------
pip        10.0.1
setuptools 39.2.0
wheel      0.31.1

(venv) [blogsystem@localhost ~]$ pip install pymysql
Collecting pymysql
  Downloading https://files.pythonhosted.org/packages/32/e8/222d9e1c7821f935d6dba8d4c60b9985124149b35a9f93a84f0b98afc219/PyMySQL-0.8.1-py2.py3-none-any.whl (81kB)
    100% |████████████████████████████████| 81kB 63kB/s
Installing collected packages: pymysql
Successfully installed pymysql-0.8.1

(venv) [blogsystem@localhost ~]$ pip list
Package    Version
---------- -------
pip        10.0.1
PyMySQL    0.8.1
setuptools 39.2.0
wheel      0.31.1
导出虚拟环境venv下的所有包到requirements.txt文件:
(venv) [blogsystem@localhost ~]$ pip freeze > requirements.txt
(venv) [blogsystem@localhost ~]$ ls
blogs_home  download  requirements.txt  venv
(venv) [blogsystem@localhost ~]$ cat requirements.txt
PyMySQL==0.8.1
在虚拟环境venv下卸载包:
(venv) [blogsystem@localhost ~]$ pip uninstall pymysql
Uninstalling PyMySQL-0.8.1:
  Would remove:
    /cloud/blogsystem/venv/lib/python3.6/site-packages/PyMySQL-0.8.1.dist-info/*
    /cloud/blogsystem/venv/lib/python3.6/site-packages/pymysql/*
Proceed (y/n)? y
  Successfully uninstalled PyMySQL-0.8.1
(venv) [blogsystem@localhost ~]$ pip list
Package    Version
---------- -------
pip        10.0.1
setuptools 39.2.0
wheel      0.31.1
退出虚拟环境venv:
(venv) [blogsystem@localhost ~]$ deactivate
[blogsystem@localhost ~]$
删除虚拟环境venv,直接删除venv文件夹即可:
[blogsystem@localhost ~]$ ls
blogs_home  download  requirements.txt  venv
[blogsystem@localhost ~]$ rm -rf venv/
[blogsystem@localhost ~]$ ls
blogs_home  download  requirements.txt
通过requirements.txt在虚拟环境中安装包:
[blogsystem@localhost ~]$ virtualenv venv
Using base prefix '/usr/local'
New python executable in /cloud/blogsystem/venv/bin/python3.6
Also creating executable in /cloud/blogsystem/venv/bin/python
Installing setuptools, pip, wheel...done.
[blogsystem@localhost ~]$ source venv/bin/activate
(venv) [blogsystem@localhost ~]$ pip list
Package    Version
---------- -------
pip        10.0.1
setuptools 39.2.0
wheel      0.31.1
(venv) [blogsystem@localhost ~]$ pip install -r requirements.txt
Collecting PyMySQL==0.8.1 (from -r requirements.txt (line 1))
  Using cached https://files.pythonhosted.org/packages/32/e8/222d9e1c7821f935d6dba8d4c60b9985124149b35a9f93a84f0b98afc219/PyMySQL-0.8.1-py2.py3-none-any.whl
Installing collected packages: PyMySQL
Successfully installed PyMySQL-0.8.1
(venv) [blogsystem@localhost ~]$ pip list
Package    Version
---------- -------
pip        10.0.1
PyMySQL    0.8.1
setuptools 39.2.0
wheel      0.31.1
以上安装并没有配置pip安装所使用的源,默认为官方的源,受网络影响,有时安装可能会比较慢,同时,使用vitrualenv运行虚拟环境时,必须需要到特定的目录下才能启动虚拟环境,使用有些不便,下面针对以上两个问题,分别配置pip国内源,以及安装virtualenvwrapper来管理虚拟环境。
pip国内镜像源配置
- linux环境配置方法
更改默认配置,~/.pip/pip.conf,一般这个文件需要自己创建:
mkdir ~/.pip
vim ~/.pip/pip.conf
在pip.conf文件中添加以下内容:
[global]
index-url = http://mirrors.aliyun.com/pypi/simple/
[install]
trusted-host = mirrors.aliyun.com
- windows环境配置方法
在当前用户下目录,新建一个pip文件夹和pip.ini文件,并在pip.ini中添加以下内容:
[global]
index-url = http://mirrors.aliyun.com/pypi/simple/
[install]
trusted-host = mirrors.aliyun.com
pip常用命令
- pip install package_name 安装包
- pip uninstall -y package_name 卸载包
- pip search package_name 查询包名
- pip list 列出安装了哪些包
- pip freeze > requirements.txt 生成依赖包列表
- pip install -r requirements.txt 安装依赖包
virtualenvwrapper的安装
- linux环境配置方法
使用pip进行安装,可以发现pip源已经替换成的阿里云源:
[root@localhost ~]# pip install virtualenvwrapper
Looking in indexes: http://mirrors.aliyun.com/pypi/simple/
Collecting virtualenvwrapper
  Downloading http://mirrors.aliyun.com/pypi/packages/2b/8c/3192e10913ad945c0f0fcb17e9b2679434a28ad58ee31ce0104cba3b1154/virtualenvwrapper-4.8.2-py2.py3-none-any.whl
Requirement already satisfied: stevedore in /usr/local/lib/python3.6/site-packages (from virtualenvwrapper) (1.28.0)
Requirement already satisfied: virtualenv in /usr/local/lib/python3.6/site-packages (from virtualenvwrapper) (16.0.0)
Requirement already satisfied: virtualenv-clone in /usr/local/lib/python3.6/site-packages (from virtualenvwrapper) (0.3.0)
Requirement already satisfied: six>=1.10.0 in /usr/local/lib/python3.6/site-packages (from stevedore->virtualenvwrapper) (1.11.0)
Requirement already satisfied: pbr!=2.1.0,>=2.0.0 in /usr/local/lib/python3.6/site-packages (from stevedore->virtualenvwrapper) (4.0.4)
Installing collected packages: virtualenvwrapper
Successfully installed virtualenvwrapper-4.8.2
创建虚拟目录:
[root@localhost ~]# mkdir virtual_env
在~/.bashrc中末尾添加配置信息,并保存:
export VIRTUALENVWRAPPER_PYTHON=/usr/bin/python3
export WORKON_HOME=/root/virtual_env
source /usr/local/bin/virtualenvwrapper.sh
使配置信息的修改生效:
[root@localhost ~]# source ~/.bashrc
- windows环境配置方法
使用pip进行安装,可以发现pip源已经替换成的阿里云源:
E:\meichaohui\sphinx_data\meizhaohui_blog>pip install virtualenvwrapper-win
Looking in indexes: http://mirrors.aliyun.com/pypi/simple/
Collecting virtualenvwrapper-win
  Downloading http://mirrors.aliyun.com/pypi/packages/f5/23/4cba98733b9122219ce67177d745e4984b524b867cf3728eaa807ea21919/virtualenvwrapper-win-1.2.5.tar.gz
Requirement already satisfied: virtualenv in d:\program files (x86)\python3.6.2\lib\site-packages (from virtualenvwrapper-win) (16.0.0)
Installing collected packages: virtualenvwrapper-win
  Running setup.py install for virtualenvwrapper-win ... done
Successfully installed virtualenvwrapper-win-1.2.5
创建虚拟目录:
在D:\data目录下创建虚拟目录virtualenv_home。
配置环境变量:
依次打开 控制面板\系统和安全\系统\高级系统设置\高级\环境变量,添加环境变量WORKON_HOME

变量名:WORKON_HOME
变量值:D:\data\virtualenv_home
virtualenvwrapper的使用
linux环境virtualenvwrapper获取帮助:
[root@localhost ~]# virtualenvwrapper

virtualenvwrapper is a set of extensions to Ian Bicking's virtualenv
tool.  The extensions include wrappers for creating and deleting
virtual environments and otherwise managing your development workflow,
making it easier to work on more than one project at a time without
introducing conflicts in their dependencies.

For more information please refer to the documentation:

    http://virtualenvwrapper.readthedocs.org/en/latest/command_ref.html

Commands available:

  add2virtualenv: add directory to the import path

  allvirtualenv: run a command in all virtualenvs

  cdproject: change directory to the active project

  cdsitepackages: change to the site-packages directory

  cdvirtualenv: change to the $VIRTUAL_ENV directory

  cpvirtualenv: duplicate the named virtualenv to make a new one

  lssitepackages: list contents of the site-packages directory

  lsvirtualenv: list virtualenvs

  mkproject: create a new project directory and its associated virtualenv

  mktmpenv: create a temporary virtualenv

  mkvirtualenv: Create a new virtualenv in $WORKON_HOME

  rmvirtualenv: Remove a virtualenv

  setvirtualenvproject: associate a project directory with a virtualenv

  showvirtualenv: show details of a single virtualenv

  toggleglobalsitepackages: turn access to global site-packages on/off

  virtualenvwrapper: show this help message

  wipeenv: remove all packages installed in the current virtualenv

  workon: list or change working virtualenvs
windows环境virtualenvwrapper获取帮助:
D:\data> virtualenvwrapper

 virtualenvwrapper is a set of extensions to Ian Bicking's virtualenv
 tool.  The extensions include wrappers for creating and deleting
 virtual environments and otherwise managing your development workflow,
 making it easier to work on more than one project at a time without
 introducing conflicts in their dependencies.

 virtualenvwrapper-win is a port of Dough Hellman's virtualenvwrapper to Windows
 batch scripts.

 Commands available:

   add2virtualenv: add directory to the import path

   cdproject: change directory to the active project

   cdsitepackages: change to the site-packages directory

   cdvirtualenv: change to the $VIRTUAL_ENV directory

   lssitepackages: list contents of the site-packages directory

   lsvirtualenv: list virtualenvs

   mkproject: create a new project directory and its associated virtualenv

   mkvirtualenv: Create a new virtualenv in $WORKON_HOME

   rmvirtualenv: Remove a virtualenv

   setprojectdir: associate a project directory with a virtualenv
   toggleglobalsitepackages: turn access to global site-packages on/off

   virtualenvwrapper: show this help message

   whereis: return full path to executable on path.

   workon: list or change working virtualenvs
通过上面的帮助,可以知道linux系统和windows系统上面virtualenvwrapper大部分命令相同,下面在windows上面使用virtualenvwrapper。
virtualenvwrapper常用命令:
workon:列出虚拟环境列表
lsvirtualenv:列出虚拟环境列表
mkvirtualenv [virtualenv_name]:新建虚拟环境
workon [virtualenv_name]:切换虚拟环境
rmvirtualenv  [virtualenv_name]:删除虚拟环境
deactivate: 离开虚拟环境
虚拟环境的使用示例:
D:\data>workon

Pass a name to activate one of the following virtualenvs:
==============================================================================
venv

D:\data>lsvirtualenv

dir /b /ad "D:\data\virtualenv_home"
==============================================================================
venv

D:\data>mkvirtualenv venv_test
Using base prefix 'd:\\program files (x86)\\python3.6.2'
New python executable in D:\data\virtualenv_home\venv_test\Scripts\python.exe
Installing setuptools, pip, wheel...done.

(venv_test) D:\data>workon

Pass a name to activate one of the following virtualenvs:
==============================================================================
venv
venv_test

(venv_test) D:\data>lsvirtualenv

dir /b /ad "D:\data\virtualenv_home"
==============================================================================
venv
venv_test

(venv_test) D:\data>workon venv_test
(venv_test) D:\data>pip install pymysql
Looking in indexes: http://mirrors.aliyun.com/pypi/simple/
Collecting pymysql
  Downloading http://mirrors.aliyun.com/pypi/packages/32/e8/222d9e1c7821f935d6dba8d4c60b9985124149b35a9f93a84f0b98afc219/PyMySQL-0.8.1-py2.py3-none-any.whl (81kB)
    100% |████████████████████████████████| 81kB 989kB/s
Installing collected packages: pymysql
Successfully installed pymysql-0.8.1

(venv_test) D:\data>rmvirtualenv venv_test

    Deleted D:\data\virtualenv_home\venv_test

(venv) D:\data>deactivate

D:\data>
Linux环境安装和使用ipython和jupyter notebook
- ipython是一个python的交互式shell,比默认的python shell好用得多,支持变量自动补全,自动缩进,支持bash shell命令,内置了许多很有用的功能和函数。学习ipython将会让我们以一种更高的效率来使用python。同时它也是利用Python进行科学计算和交互可视化的一个最佳的平台。
安装ipython和jupyter:
[root@hellolinux ~]# pip install ipython jupyter
Looking in indexes: https://mirrors.aliyun.com/pypi/simple/
Collecting ipython
  Downloading https://mirrors.aliyun.com/pypi/packages/f6/c4/a79582814bdfe92bfca4d286a729304ffdf13f5135132cfcaea13cf1b2b3/ipython-7.7.0-py3-none-any.whl (774kB)
     |████████████████████████████████| 778kB 381kB/s
Collecting jupyter
  Downloading https://mirrors.aliyun.com/pypi/packages/83/df/0f5dd132200728a86190397e1ea87cd76244e42d39ec5e88efd25b2abd7e/jupyter-1.0.0-py2.py3-none-any.whl
Requirement already satisfied: jedi>=0.10 in /usr/lib/python3.6/site-packages (from ipython) (0.15.1)
Requirement already satisfied: setuptools>=18.5 in /usr/lib/python3.6/site-packages (from ipython) (39.0.1)
Requirement already satisfied: backcall in /usr/lib/python3.6/site-packages (from ipython) (0.1.0)
Requirement already satisfied: traitlets>=4.2 in /usr/lib/python3.6/site-packages (from ipython) (4.3.2)
Requirement already satisfied: prompt-toolkit<2.1.0,>=2.0.0 in /usr/lib/python3.6/site-packages (from ipython) (2.0.9)
Requirement already satisfied: pexpect; sys_platform != "win32" in /usr/lib/python3.6/site-packages (from ipython) (4.7.0)
Requirement already satisfied: decorator in /usr/lib/python3.6/site-packages (from ipython) (4.4.0)
Requirement already satisfied: pickleshare in /usr/lib/python3.6/site-packages (from ipython) (0.7.5)
Requirement already satisfied: pygments in /usr/lib64/python3.6/site-packages (from ipython) (2.4.2)
Collecting ipykernel (from jupyter)
  Downloading https://mirrors.aliyun.com/pypi/packages/d4/16/43f51f65a8a08addf04f909a0938b06ba1ee1708b398a9282474531bd893/ipykernel-5.1.2-py3-none-any.whl (116kB)
     |████████████████████████████████| 122kB 1.9MB/s
Collecting jupyter-console (from jupyter)
  Downloading https://mirrors.aliyun.com/pypi/packages/cb/ee/6374ae8c21b7d0847f9c3722dcdfac986b8e54fa9ad9ea66e1eb6320d2b8/jupyter_console-6.0.0-py2.py3-none-any.whl
Collecting nbconvert (from jupyter)
  Downloading https://mirrors.aliyun.com/pypi/packages/f9/df/4505c0a7fea624cac461d0f41051f33456ae656753f65cee8c2f43121cb2/nbconvert-5.6.0-py2.py3-none-any.whl (453kB)
     |████████████████████████████████| 460kB 1.7MB/s
Collecting ipywidgets (from jupyter)
  Downloading https://mirrors.aliyun.com/pypi/packages/56/a0/dbcf5881bb2f51e8db678211907f16ea0a182b232c591a6d6f276985ca95/ipywidgets-7.5.1-py2.py3-none-any.whl (121kB)
     |████████████████████████████████| 122kB 4.7MB/s
Collecting notebook (from jupyter)
  Downloading https://mirrors.aliyun.com/pypi/packages/f3/a1/1e07cedcb554408fefe4a7d32b2a041c86517167aec6ca8251c808ef6c1e/notebook-6.0.1-py3-none-any.whl (9.0MB)
     |████████████████████████████████| 9.0MB 2.1MB/s
Collecting qtconsole (from jupyter)
  Downloading https://mirrors.aliyun.com/pypi/packages/21/a0/37a7b61eeac6d02cdabc45a60659297e3017f6ff7f2ca6bdec629aa248dd/qtconsole-4.5.4-py2.py3-none-any.whl (120kB)
     |████████████████████████████████| 122kB 2.3MB/s
Requirement already satisfied: parso>=0.5.0 in /usr/lib/python3.6/site-packages (from jedi>=0.10->ipython) (0.5.1)
Requirement already satisfied: six in /usr/lib/python3.6/site-packages (from traitlets>=4.2->ipython) (1.12.0)
Requirement already satisfied: ipython-genutils in /usr/lib/python3.6/site-packages (from traitlets>=4.2->ipython) (0.2.0)
Requirement already satisfied: wcwidth in /usr/lib/python3.6/site-packages (from prompt-toolkit<2.1.0,>=2.0.0->ipython) (0.1.7)
Requirement already satisfied: ptyprocess>=0.5 in /usr/lib/python3.6/site-packages (from pexpect; sys_platform != "win32"->ipython) (0.6.0)
Collecting tornado>=4.2 (from ipykernel->jupyter)
  Downloading https://mirrors.aliyun.com/pypi/packages/30/78/2d2823598496127b21423baffaa186b668f73cd91887fcef78b6eade136b/tornado-6.0.3.tar.gz (482kB)
     |████████████████████████████████| 491kB 4.2MB/s
Collecting jupyter-client (from ipykernel->jupyter)
  Downloading https://mirrors.aliyun.com/pypi/packages/af/4c/bf613864ae0644e2ac7d4a40bd209c40c8c71e3dc88d5f1d0aa92a68e716/jupyter_client-5.3.1-py2.py3-none-any.whl (91kB)
     |████████████████████████████████| 92kB 6.2MB/s
Collecting jinja2>=2.4 (from nbconvert->jupyter)
  Downloading https://mirrors.aliyun.com/pypi/packages/1d/e7/fd8b501e7a6dfe492a433deb7b9d833d39ca74916fa8bc63dd1a4947a671/Jinja2-2.10.1-py2.py3-none-any.whl (124kB)
     |████████████████████████████████| 133kB 3.6MB/s
Collecting nbformat>=4.4 (from nbconvert->jupyter)
  Downloading https://mirrors.aliyun.com/pypi/packages/da/27/9a654d2b6cc1eaa517d1c5a4405166c7f6d72f04f6e7eea41855fe808a46/nbformat-4.4.0-py2.py3-none-any.whl (155kB)
     |████████████████████████████████| 163kB 3.9MB/s
Collecting entrypoints>=0.2.2 (from nbconvert->jupyter)
  Downloading https://mirrors.aliyun.com/pypi/packages/ac/c6/44694103f8c221443ee6b0041f69e2740d89a25641e62fb4f2ee568f2f9c/entrypoints-0.3-py2.py3-none-any.whl
Collecting testpath (from nbconvert->jupyter)
  Downloading https://mirrors.aliyun.com/pypi/packages/be/a4/162f9ebb6489421fe46dcca2ae420369edfee4b563c668d93cb4605d12ba/testpath-0.4.2-py2.py3-none-any.whl (163kB)
     |████████████████████████████████| 163kB 2.7MB/s
Collecting jupyter-core (from nbconvert->jupyter)
  Downloading https://mirrors.aliyun.com/pypi/packages/e6/25/6ffb0f6e57fa6ef5d2f814377133b361b42a6dd39105f4885a4f1666c2c3/jupyter_core-4.5.0-py2.py3-none-any.whl (78kB)
     |████████████████████████████████| 81kB 3.0MB/s
Collecting bleach (from nbconvert->jupyter)
  Downloading https://mirrors.aliyun.com/pypi/packages/ab/05/27e1466475e816d3001efb6e0a85a819be17411420494a1e602c36f8299d/bleach-3.1.0-py2.py3-none-any.whl (157kB)
     |████████████████████████████████| 163kB 2.6MB/s
Collecting mistune<2,>=0.8.1 (from nbconvert->jupyter)
  Downloading https://mirrors.aliyun.com/pypi/packages/09/ec/4b43dae793655b7d8a25f76119624350b4d65eb663459eb9603d7f1f0345/mistune-0.8.4-py2.py3-none-any.whl
Collecting pandocfilters>=1.4.1 (from nbconvert->jupyter)
  Downloading https://mirrors.aliyun.com/pypi/packages/4c/ea/236e2584af67bb6df960832731a6e5325fd4441de001767da328c33368ce/pandocfilters-1.4.2.tar.gz
Collecting defusedxml (from nbconvert->jupyter)
  Downloading https://mirrors.aliyun.com/pypi/packages/06/74/9b387472866358ebc08732de3da6dc48e44b0aacd2ddaa5cb85ab7e986a2/defusedxml-0.6.0-py2.py3-none-any.whl
Collecting widgetsnbextension~=3.5.0 (from ipywidgets->jupyter)
  Downloading https://mirrors.aliyun.com/pypi/packages/6c/7b/7ac231c20d2d33c445eaacf8a433f4e22c60677eb9776c7c5262d7ddee2d/widgetsnbextension-3.5.1-py2.py3-none-any.whl (2.2MB)
     |████████████████████████████████| 2.2MB 3.0MB/s
Collecting Send2Trash (from notebook->jupyter)
  Downloading https://mirrors.aliyun.com/pypi/packages/49/46/c3dc27481d1cc57b9385aff41c474ceb7714f7935b1247194adae45db714/Send2Trash-1.5.0-py3-none-any.whl
Collecting prometheus-client (from notebook->jupyter)
  Downloading https://mirrors.aliyun.com/pypi/packages/b3/23/41a5a24b502d35a4ad50a5bb7202a5e1d9a0364d0c12f56db3dbf7aca76d/prometheus_client-0.7.1.tar.gz
Collecting pyzmq>=17 (from notebook->jupyter)
  Downloading https://mirrors.aliyun.com/pypi/packages/75/89/6f0ea51ffa9c2c00c0ab0460f137b16a5ab5b47e3b060c5b1fc9ca425836/pyzmq-18.1.0-cp36-cp36m-manylinux1_x86_64.whl (1.1MB)
     |████████████████████████████████| 1.1MB 5.2MB/s
Collecting terminado>=0.8.1 (from notebook->jupyter)
  Downloading https://mirrors.aliyun.com/pypi/packages/a7/56/80ea7fa66565fa75ae21ce0c16bc90067530e5d15e48854afcc86585a391/terminado-0.8.2-py2.py3-none-any.whl
Collecting python-dateutil>=2.1 (from jupyter-client->ipykernel->jupyter)
  Downloading https://mirrors.aliyun.com/pypi/packages/41/17/c62faccbfbd163c7f57f3844689e3a78bae1f403648a6afb1d0866d87fbb/python_dateutil-2.8.0-py2.py3-none-any.whl (226kB)
     |████████████████████████████████| 235kB 3.5MB/s
Collecting MarkupSafe>=0.23 (from jinja2>=2.4->nbconvert->jupyter)
  Downloading https://mirrors.aliyun.com/pypi/packages/b2/5f/23e0023be6bb885d00ffbefad2942bc51a620328ee910f64abe5a8d18dd1/MarkupSafe-1.1.1-cp36-cp36m-manylinux1_x86_64.whl
Collecting jsonschema!=2.5.0,>=2.4 (from nbformat>=4.4->nbconvert->jupyter)
  Downloading https://mirrors.aliyun.com/pypi/packages/54/48/f5f11003ceddcd4ad292d4d9b5677588e9169eef41f88e38b2888e7ec6c4/jsonschema-3.0.2-py2.py3-none-any.whl (54kB)
     |████████████████████████████████| 61kB 2.7MB/s
Collecting webencodings (from bleach->nbconvert->jupyter)
  Downloading https://mirrors.aliyun.com/pypi/packages/f4/24/2a3e3df732393fed8b3ebf2ec078f05546de641fe1b667ee316ec1dcf3b7/webencodings-0.5.1-py2.py3-none-any.whl
Collecting pyrsistent>=0.14.0 (from jsonschema!=2.5.0,>=2.4->nbformat>=4.4->nbconvert->jupyter)
  Downloading https://mirrors.aliyun.com/pypi/packages/b9/66/b2638d96a2d128b168d0dba60fdc77b7800a9b4a5340cefcc5fc4eae6295/pyrsistent-0.15.4.tar.gz (107kB)
     |████████████████████████████████| 112kB 5.0MB/s
Collecting attrs>=17.4.0 (from jsonschema!=2.5.0,>=2.4->nbformat>=4.4->nbconvert->jupyter)
  Downloading https://mirrors.aliyun.com/pypi/packages/23/96/d828354fa2dbdf216eaa7b7de0db692f12c234f7ef888cc14980ef40d1d2/attrs-19.1.0-py2.py3-none-any.whl
Installing collected packages: ipython, tornado, jupyter-core, python-dateutil, pyzmq, jupyter-client, ipykernel, jupyter-console, MarkupSafe, jinja2, pyrsistent, attrs, jsonschema, nbformat, entrypoints, testpath, webencodings, bleach, mistune, pandocfilters, defusedxml, nbconvert, Send2Trash, prometheus-client, terminado, notebook, widgetsnbextension, ipywidgets, qtconsole, jupyter
  Running setup.py install for tornado ... done
  Running setup.py install for pyrsistent ... done
  Running setup.py install for pandocfilters ... done
  Running setup.py install for prometheus-client ... done
Successfully installed MarkupSafe-1.1.1 Send2Trash-1.5.0 attrs-19.1.0 bleach-3.1.0 defusedxml-0.6.0 entrypoints-0.3 ipykernel-5.1.2 ipython-7.7.0 ipywidgets-7.5.1 jinja2-2.10.1 jsonschema-3.0.2 jupyter-1.0.0 jupyter-client-5.3.1 jupyter-console-6.0.0 jupyter-core-4.5.0 mistune-0.8.4 nbconvert-5.6.0 nbformat-4.4.0 notebook-6.0.1 pandocfilters-1.4.2 prometheus-client-0.7.1 pyrsistent-0.15.4 python-dateutil-2.8.0 pyzmq-18.1.0 qtconsole-4.5.4 terminado-0.8.2 testpath-0.4.2 tornado-6.0.3 webencodings-0.5.1 widgetsnbextension-3.5.1
[root@hellolinux ~]#
使用ipython:
[root@hellolinux ~]# ipython
Python 3.6.8 (default, May  2 2019, 20:40:44)
Type 'copyright', 'credits' or 'license' for more information
IPython 7.7.0 -- An enhanced Interactive Python. Type '?' for help.

In [1]: import os

In [2]: os.name
Out[2]: 'posix'

In [3]: quit
[root@hellolinux ~]#
ipython设置经典”>>>”提示符:
# 创建IPython的自定义配置文件
[root@hellolinux ~]# ipython profile create
[ProfileCreate] Generating default config file: '/root/.ipython/profile_default/ipython_config.py'
[ProfileCreate] Generating default config file: '/root/.ipython/profile_default/ipython_kernel_config.py'

# 修改~/.ipython/profile_default/ipython_config.py配置文件,设置经典提示符的风格ClassicPrompts
[root@hellolinux ~]# sed -i "s@#c.TerminalInteractiveShell.prompts_class = 'IPython.terminal.prompts.Prompts'@c.TerminalInteractiveShell.prompts_class = 'IPython.terminal.prompts.ClassicPrompts'@g" /root/.ipython/profile_default/ipython_config.py
[root@hellolinux ~]# cat .ipython/profile_default/ipython_config.py|sed -n '327p'
c.TerminalInteractiveShell.prompts_class = 'IPython.terminal.prompts.ClassicPrompts'
再次打开ipython:
[root@hellolinux ~]# ipython
Python 3.6.8 (default, May  2 2019, 20:40:44)
Type 'copyright', 'credits' or 'license' for more information
IPython 7.7.0 -- An enhanced Interactive Python. Type '?' for help.

>>> import os

>>> os.name
'posix'

>>> quit
[root@hellolinux ~]#
- Jupyter Notebook允许你在浏览器中执行Python命令!IPython Notebook实质就是Jupyter Notebook。
- IPython Notebook使用浏览器作为界面,向后台的IPython服务器发送请求,并显示结果。在浏览器的界面中使用单元(Cell)保存各种信息。Cell有多种类型,需要强调的是,它也支持MarkDown语法,所以可以有MarkDown格式化文本单元,也可以有表示代码的Code单元。
- IPython Notebook有一个重要的特点就是:可重复性的互动计算,这意味着我们可以重复更改并且执行曾经的输入记录。它可以保存成其他很多格式,比如Python脚本,HTML,PDF等,所以它可以记录我们的演算过程。很多课程,博客以及书籍都是用Notebook写的。
Jupyter的配置:
# 生成一个notebook配置文件
[root@hellolinux ~]# jupyter notebook --generate-config
Writing default config to: /root/.jupyter/jupyter_notebook_config.py
# 生成密码
[root@hellolinux ~]# jupyter notebook password
Enter password:       <-- 此处输入密码,如123456
Verify password:      <-- 此处再次输入密码,与上面的密码保持一致
[NotebookPasswordApp] Wrote hashed password to /root/.jupyter/jupyter_notebook_config.json

# 获取刚才生成的加密的密码,注:jq工具是解决json字符串的工具
[root@hellolinux ~]# cat .jupyter/jupyter_notebook_config.json |jq
{
  "NotebookApp": {
    "password": "sha1:c80b33f88f4a:2c5ea918c4eaa88119ee195d68cdefd4d61b99f2"
  }
}
[root@hellolinux ~]# notebook_passwd=$(cat .jupyter/jupyter_notebook_config.json |jq '.NotebookApp.password'|sed 's/"//g')
[root@hellolinux ~]# echo $notebook_passwd
sha1:c80b33f88f4a:2c5ea918c4eaa88119ee195d68cdefd4d61b99f2

# 生成自签名证书,参考 https://jupyter-notebook.readthedocs.io/en/stable/public_server.html?highlight=certfile#securing-a-notebook-server
[root@hellolinux ~]# cd .jupyter/
[root@hellolinux .jupyter]# openssl req -x509 -nodes -days 365 -newkey rsa:2048 -keyout mykey.key -out mycert.pem
Generating a 2048 bit RSA private key
................................+++
........+++
writing new private key to 'mykey.key'
-----
You are about to be asked to enter information that will be incorporated
into your certificate request.
What you are about to enter is what is called a Distinguished Name or a DN.
There are quite a few fields but you can leave some blank
For some fields there will be a default value,
If you enter '.', the field will be left blank.
-----
Country Name (2 letter code) [XX]:CN
State or Province Name (full name) []:hubei
Locality Name (eg, city) [Default City]:wuhan
Organization Name (eg, company) [Default Company Ltd]:IT
Organizational Unit Name (eg, section) []:hellolinux.com
Common Name (eg, your name or your server's hostname) []:hellolinux.com
Email Address []:mzh.whut@gmail.com
[root@hellolinux .jupyter]# ls
jupyter_notebook_config.json  jupyter_notebook_config.py  migrated  mycert.pem  mykey.key

# 创建jupyter notebook的工作目录
[root@hellolinux ~]# mkdir /root/jupyter_data

# 修改配置文件/root/.jupyter/jupyter_notebook_config.py
[root@hellolinux ~]# cat -n /root/.jupyter/jupyter_notebook_config.py |sed -n '82p;85p;102p;204p;223p;261p;267p;276p;287p'
    82  #c.NotebookApp.allow_remote_access = False
    85  #c.NotebookApp.allow_root = False
   102  #c.NotebookApp.certfile = ''
   204  #c.NotebookApp.ip = 'localhost'
   223  #c.NotebookApp.keyfile = ''
   261  #c.NotebookApp.notebook_dir = ''
   267  #c.NotebookApp.open_browser = True
   276  #c.NotebookApp.password = ''
   287  #c.NotebookApp.port = 8888
# 允许远程访问
[root@hellolinux ~]# sed -i "s@#c.NotebookApp.allow_remote_access = False@c.NotebookApp.allow_remote_access = True@g" /root/.jupyter/jupyter_notebook_config.py
# 允许root运行jupyter
[root@hellolinux ~]# sed -i "s@#c.NotebookApp.allow_root = False@c.NotebookApp.allow_root = True@g" /root/.jupyter/jupyter_notebook_config.py
# 设置自签名证书
[root@hellolinux ~]# sed -i "s@#c.NotebookApp.certfile = ''@c.NotebookApp.certfile = '/root/.jupyter/mycert.pem'@g" /root/.jupyter/jupyter_notebook_config.py
[root@hellolinux ~]# sed -i "s@#c.NotebookApp.keyfile = ''@c.NotebookApp.keyfile = '/root/.jupyter/mykey.key'@g" /root/.jupyter/jupyter_notebook_config.py

# 设置工作目录
[root@hellolinux ~]# sed -i "s@#c.NotebookApp.notebook_dir = ''@c.NotebookApp.notebook_dir = '/root/jupyter_data'@g" /root/.jupyter/jupyter_notebook_config.py

# 在所有的网卡接口上开启服务
[root@hellolinux ~]# sed -i "s@#c.NotebookApp.ip = 'localhost'@c.NotebookApp.ip = '*'@g" /root/.jupyter/jupyter_notebook_config.py
# 不打开浏览器
[root@hellolinux ~]# sed -i "s@#c.NotebookApp.open_browser = True@c.NotebookApp.open_browser = False@g" /root/.jupyter/jupyter_notebook_config.py
# 设置远程访问的密码

[root@hellolinux ~]# sed -i "s@#c.NotebookApp.password = ''@c.NotebookApp.password = '${notebook_passwd}'@g" /root/.jupyter/jupyter_notebook_config.py
# 指定WEB服务端口
[root@hellolinux ~]# sed -i "s@#c.NotebookApp.port = 8888@c.NotebookApp.port = 8888@g" /root/.jupyter/jupyter_notebook_config.py
# 修改后的内容
[root@hellolinux ~]# cat -n .jupyter/jupyter_notebook_config.py |sed -n '82p;85p;102p;204p;223p;267p;276p;287p'
    82  c.NotebookApp.allow_remote_access = True
    85  c.NotebookApp.allow_root = True
   102  c.NotebookApp.certfile = '/root/.jupyter/mycert.pem'
   204  c.NotebookApp.ip = '*'
   223  c.NotebookApp.keyfile = '/root/.jupyter/mykey.key'
   267  c.NotebookApp.open_browser = False
   276  c.NotebookApp.password = 'sha1:c80b33f88f4a:2c5ea918c4eaa88119ee195d68cdefd4d61b99f2'
   287  c.NotebookApp.port = 8888
服务器防火墙放行8888端口:
[root@hellolinux ~]# firewall-cmd --permanent --add-port=8888/tcp
success
[root@hellolinux ~]# firewall-cmd --reload
success
[root@hellolinux ~]# firewall-cmd --list-all|grep 8888
  ports: 21/tcp 6379/tcp 8888/tcp
重新启动jupyter notebook:
[root@hellolinux ~]# jupyter notebook > jupyter.log 2>&1 &
[1] 12174
[root@hellolinux ~]# ps -ef|grep jupyter
root     12174  7909 20 17:19 pts/0    00:00:02 /usr/bin/python3.6 /usr/bin/jupyter-notebook
root     12179  7909  0 17:19 pts/0    00:00:00 grep --color=auto jupyter
在浏览器中访问jupyter notebook,链接地址: https://hellolinux.com:8888
注:因为我是在虚拟机中配置的jupyter notebook,并设置了ip和域名的对应关系:
[root@hellolinux ~]# cat /etc/hosts|grep hellolinux.com
127.0.0.1 hellolinux.com
[root@hellolinux ~]# ip a show|grep 192|awk -F'[ /]+' '{print $3}'
192.168.56.103
在远程客户端也配置了相应的域名解析对应关系:
$ type C:\Windows\System32\drivers\etc\hosts|findstr hellolinux.com
192.168.56.103 hellolinux.com
所以我可以通过域名访问jupyter notebook,如果你没有配置域名解决对应关系,通过ip地址(https://192.168.56.103:8888)也可以访问:
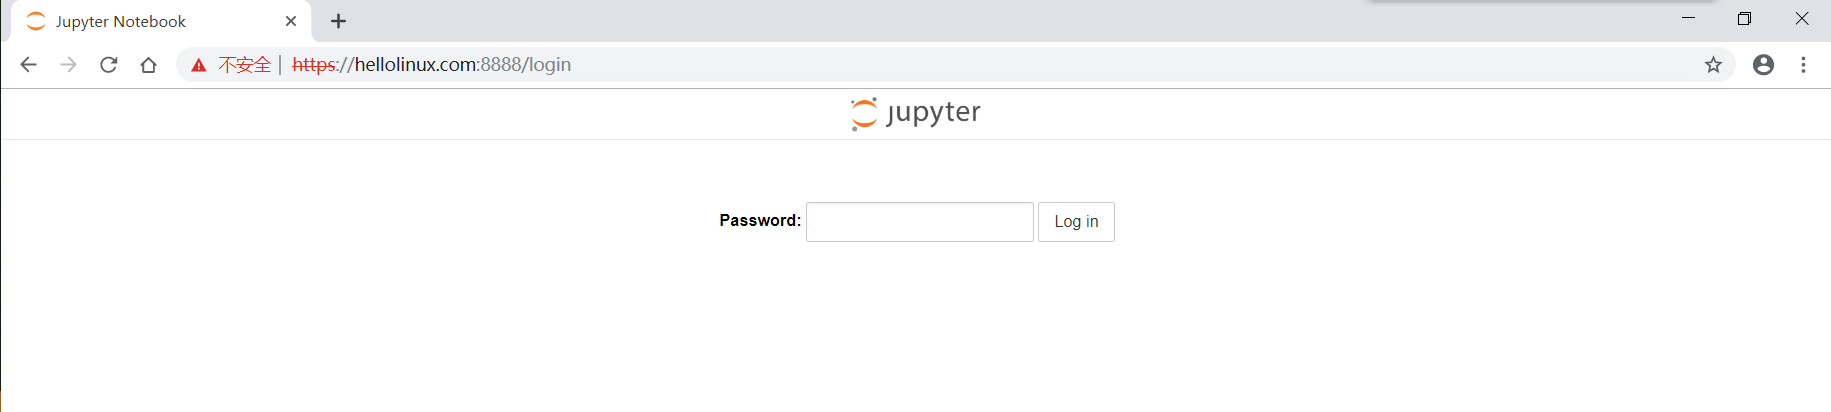
输入密码123456,登陆进jupyter notebook主页:
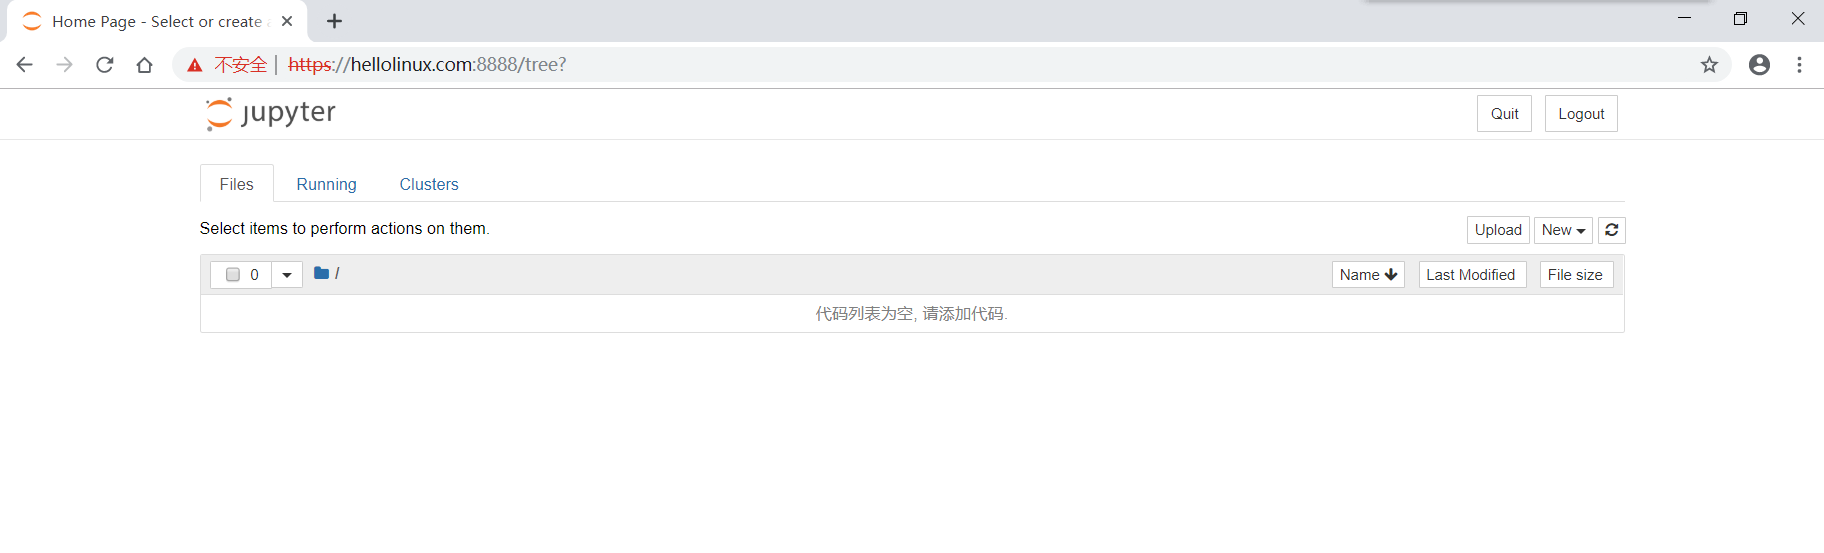
我们点击右上角的”New” –> “Python3” 可以创建Python3的notebook:
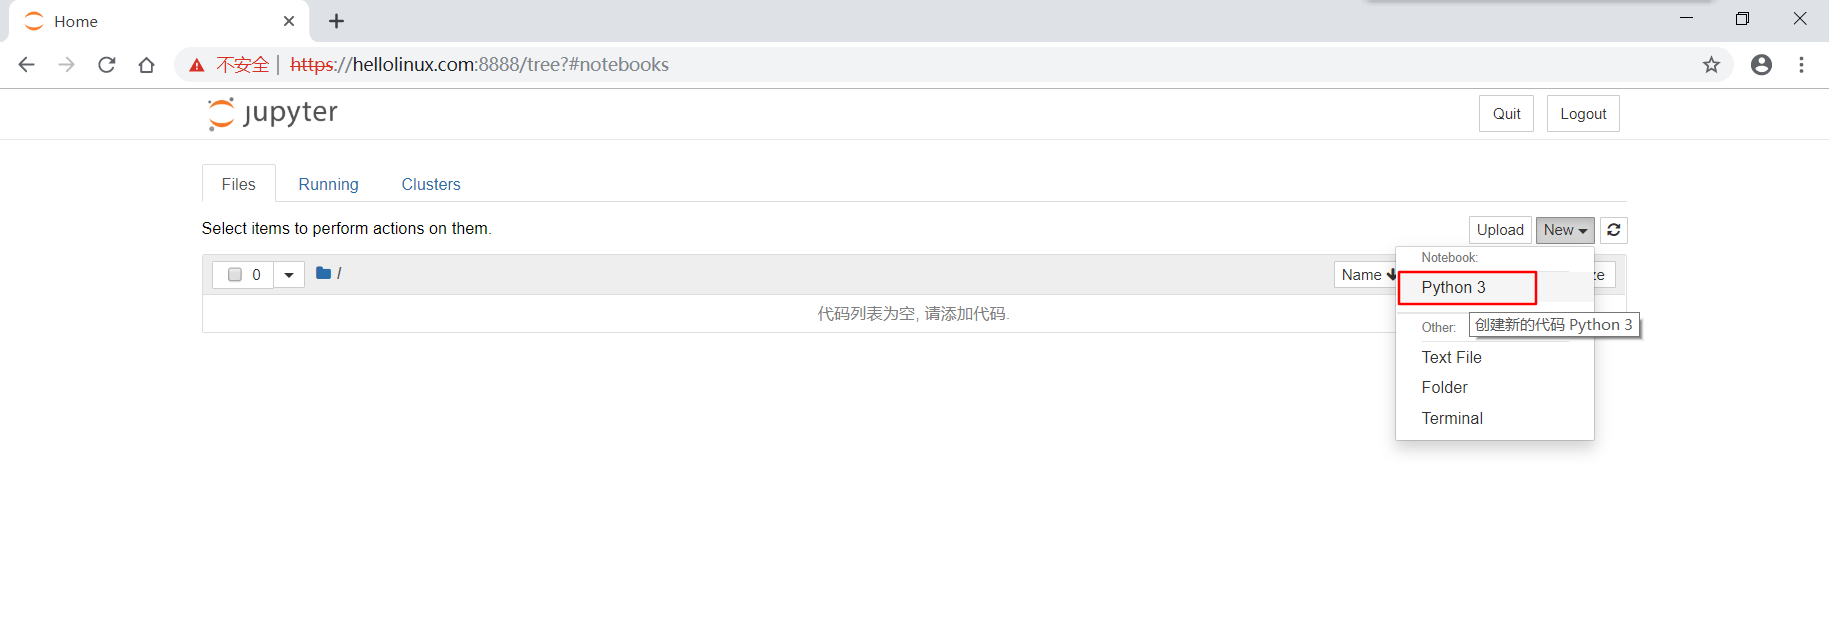
在新页面输入python命令,并按Ctrl + Enter键执行,如下图:
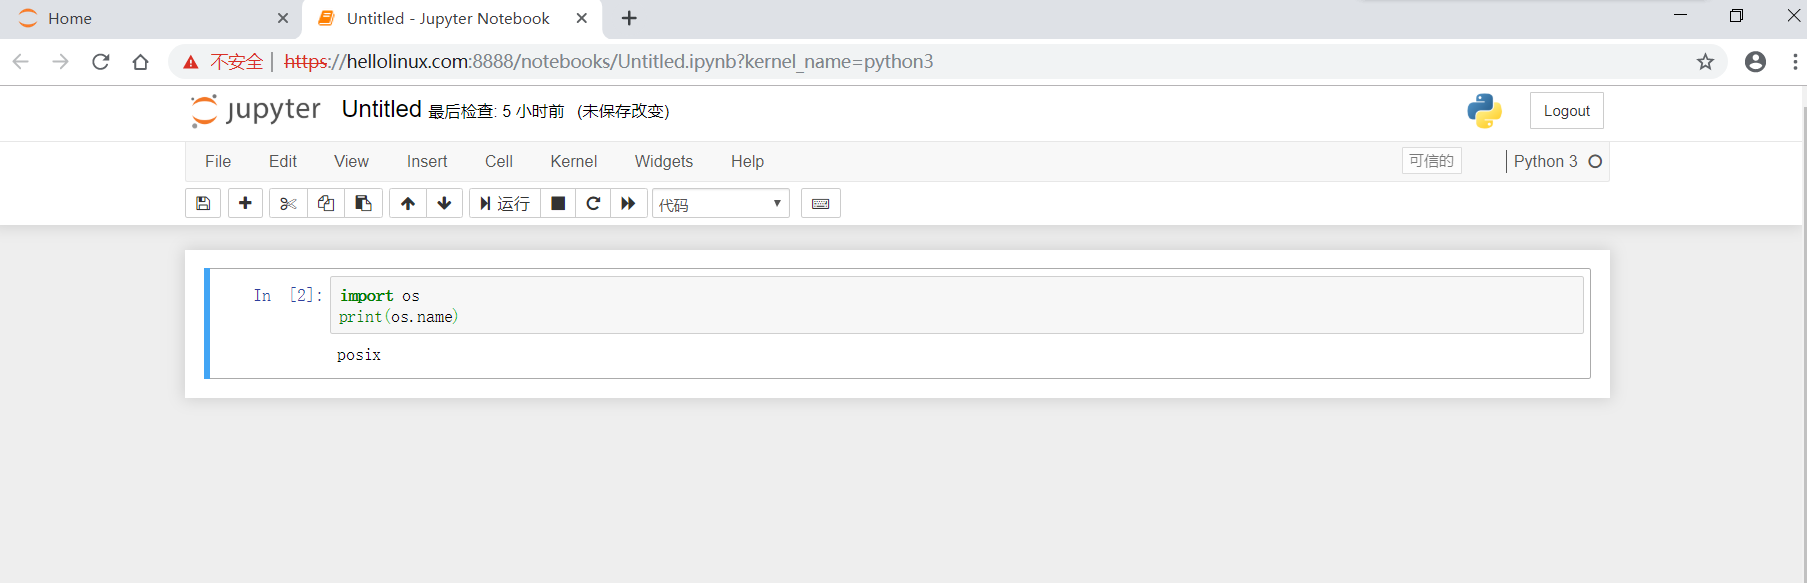
你可以使用 %timeit 计算程序执行时间,如 %timeit [i*i for i in range(1000)]。

保存文件:
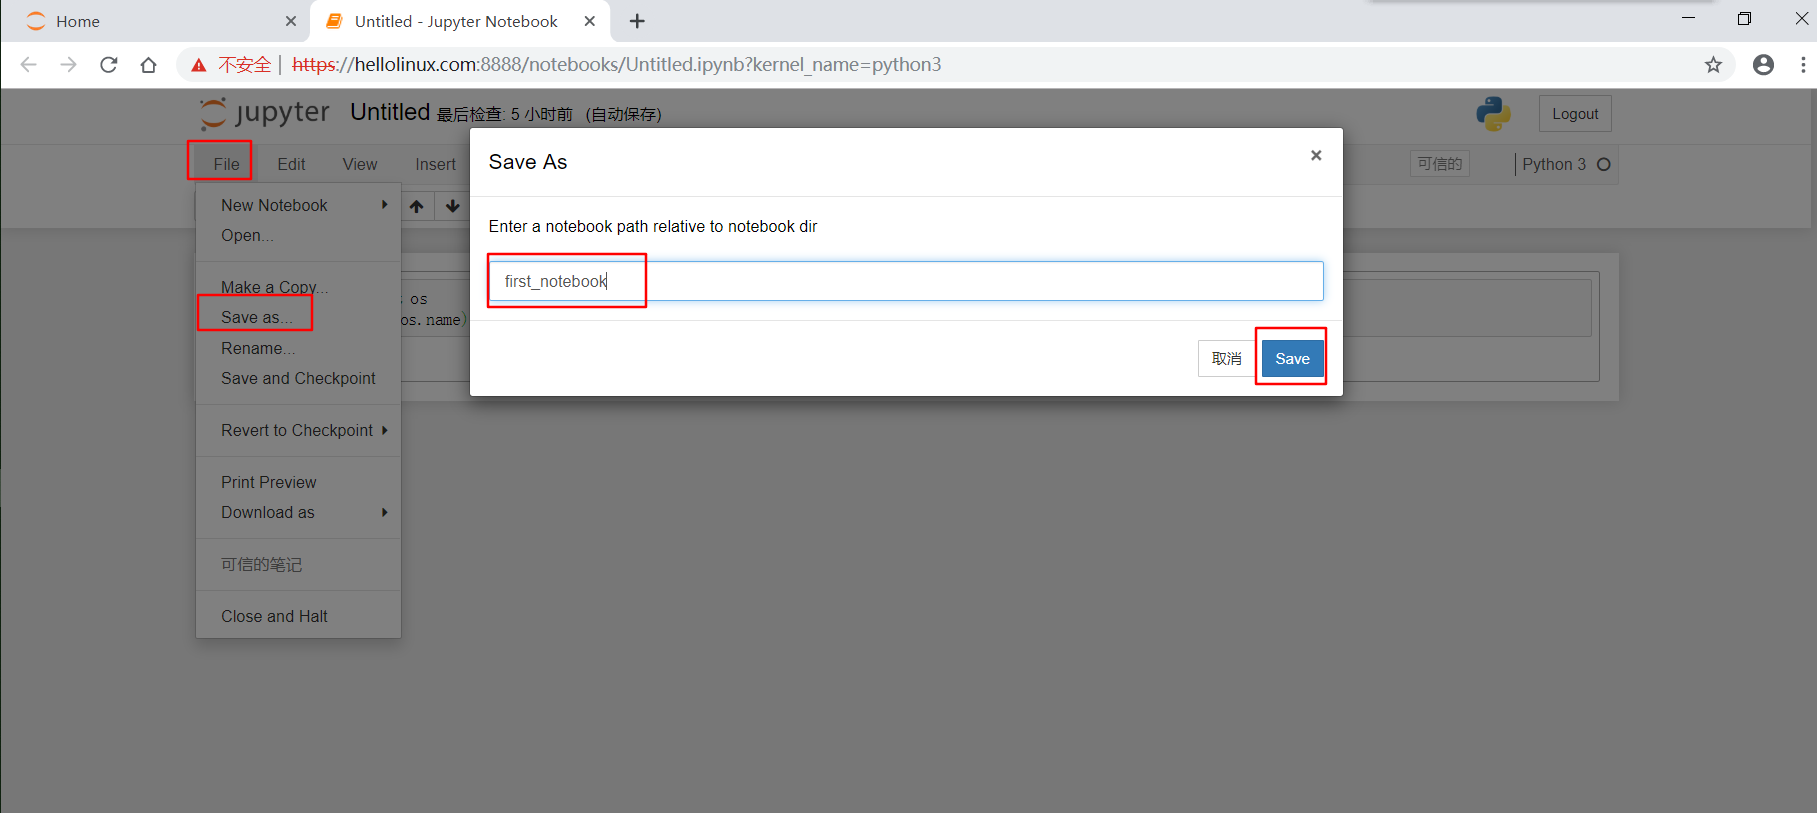
保存后,可以在服务器/root/jupyter_data目录中看到笔记文件first_notebook.ipynb:
[root@hellolinux ~]# ls -lah jupyter_data|grep first
-rw-r--r--   1 root root  703 Aug 24 17:37 first_notebook.ipynb
参考文献
- 用Sphinx+reST编写文档https://www.cnblogs.com/zzqcn/p/5096876.html#_label7_4
- python虚拟环境–virtualenvhttps://www.cnblogs.com/technologylife/p/6635631.html
- securing-a-notebook-serverhttps://jupyter-notebook.readthedocs.io/en/stable/public_server.html?highlight=certfile#securing-a-notebook-server
- RunningtheNotebookhttps://jupyter.readthedocs.io/en/latest/running.html#running